Method of measurement:
Contact (point-based systems)
-
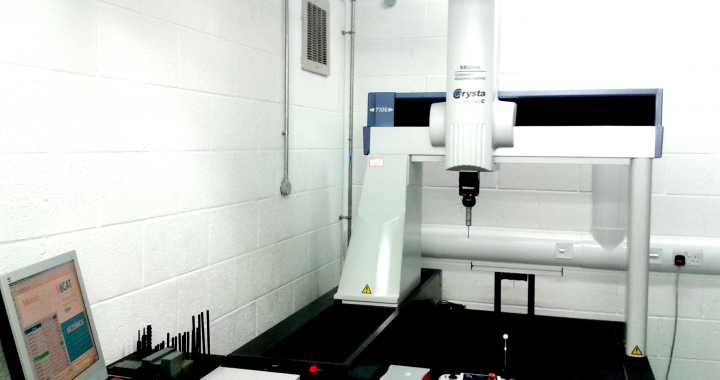
- Coordinate Measurement Machine
- (+) High accuracy measurement
- (+) Good for measurement of geometrical features:
- Diameter of Holes
- Diameter of Pins
- Cylindricity
- Roundness
- Coaxiality
- Concentricity
- (-) Restricted measurement area
- (-) Operated under temperature-controlled environment
- (-) Component to be measured must be allowed to be stabilized at that temperature
- (-) Access to certain features may cause problem
- (-) Speed of measurement – cycle time due to reposition
- (-) Less points for calculation of edge detection (done through intersection of planes and other features)
- Articulated Arm
- (+) Ideal for gauging
- (+) User friendly
- (+) Portability
- (+) Good for industrial shop floor application
- (+) Good for measurement of geometrical features:
- Diameter of Holes
- Diameter of Pins
- Cylindricity
- Roundness
- Coaxiality
- Concentricity
- (-) Restricted measurement area
- (-) Manual operation
- (-) Speed of measurement
- (-) Less points for calculation of edge detection (done through intersection of planes and other features)
- Coordinate Measurement Machine
- Non-contact
-
-
- Optical method – (Based on image processing, using backlight, direct light, and ring light)
- (+) Infinite number of points – edges are detected directly
- (+) Acceptable accuracy
- (+) Speed of measurement:
- one picture one measurement
- feature recognition
- ideal for real time statistical analysis such as SPC
- (+) Good for parts with small features
- (-) Good for measurement of flat parts only where parts can be measured in silhouette
- (-) Sensitive on dirt and dust, parts need to be clean before measurement
- (-) Hard to measure low contrast parts such as dark or white parts as well reflective surfaces
- Optical method – (Based on image processing, using backlight, direct light, and ring light)
-
-
-
- Laser scanning (Stripe based systems)
- (+) creates number of point clouds at one scan
- (+) no contact = no deformation on elastic parts like at contact method
- (+) good for clay models
- (-) point clouds must be patched together to create representation of an object
- (-) some materials absorb or in a way laser goes under surface, and measure surface underneath it, generating misleading results
- (-) Humidity affects performance
- Handheld:
- (+) good for scanning long parts
- (+) portability
- Mounted on CMM:
- Mounted on Articulated Arm:
- (-) for long parts the station needs to be moved
- Laser scanning (Stripe based systems)
-
-
-
- White light scanning (Area based systems)
- (+) Size of the area (up to several metres) scanned at once
- (+) Good for scanning small objects
- (+) Robustness and Portability makes the ideal for most demanding environments
- (-) Presence of holes can be problem, where is need on depth and shape
- White light scanning (Area based systems)
-
References:
[1] https://www.develop3d.com/reverse-engineering/a-guide-to-3d-measurement-technologies
[2] Understanding Optical Measurement Quality Digest / April 2009 (p.32 – p.35)

